
It's time for a quick break from wedding/Christmas preparations. I've wanted to do a tutorial on homemade candy canes for quite some time. If I don't do it now, it won't be any good until next Christmas season. This will be quick and may have lots of typos.
Eleven Christmases ago we moved to the midwest and a good lady in our ward invited us over to make candy canes with her family. I was perplexed. "You mean you make real candy canes?" She replied that they did. "With stripes and everything?" She assured me that they would even be striped. We enjoyed it so much that we now have a Candy Cane party with friends each year. It's become an important part of our celebration.
NOTE: Don't let the length of the written instructions deter you. I've incorporated all of the hints and tips from my friend into the recipe. It's not as extensive as it looks. I recommend that you have at least eight to twelve-ish people to do this, or you're going to get really tired of rolling them.
The recipe came from my friend's grandma. She was born in the 1880's, lived in Utah all her life and worked in a candy factory as a young girl. This is the recipe from the factory.
6 cups sugar
3 cups water
2/3 teaspoons salt
3 tablespoons light corn syrup
2/3 teaspoon cream of tartar
1/4 dram peppermint oil (or less) Available at pharmacies
red food coloring
In a large pot, combine sugar, water, salt and corn syrup. Stir really well, till all sugar crystals are dissolved (if any crystals remain when it starts to boil, the candy will turn amber). Over medium-high heat, bring to a boil (she cooks it on high because it's faster).

Then add the cream of tartar but DO NOT STIR. Put lid on pot to steam for three minutes. Remove lid and, with damp cloth, wipe crystals from sides of pan.
 Cook to hard crack stage (300-310 degrees Fahrenheit). Mixture will bubble white over entire surface. According to my friend, the cold water test is the only way to be sure it has cooked long enough. You will actually hear a small crack when the candy is dropped into a cup of cold water.
 Immediately removed the pot from the burner. Pour 2/3 onto a buttered cookie sheet to cool. Leave the other 1/3 in the pan to cool (this will be the stripe).
 Once it is cool enough to handle, lightly butter hands and pull the candy white (doesn't take very long). While pulling, add flavor. Snip a small amount off with kitchen shears to test for flavor. Next, pull, flavor and color the stripe.
Here are our friends from Kansas who joined us for Thanksgiving pulling the candy white.


Hubders adding the red to the stripe.

Lump the white into a rough ball. Stretch the red into a rough rope and make a ring around the white.

 With two people, stretch the whole thing out to about a foot or so and twist so the stripe goes around and around.
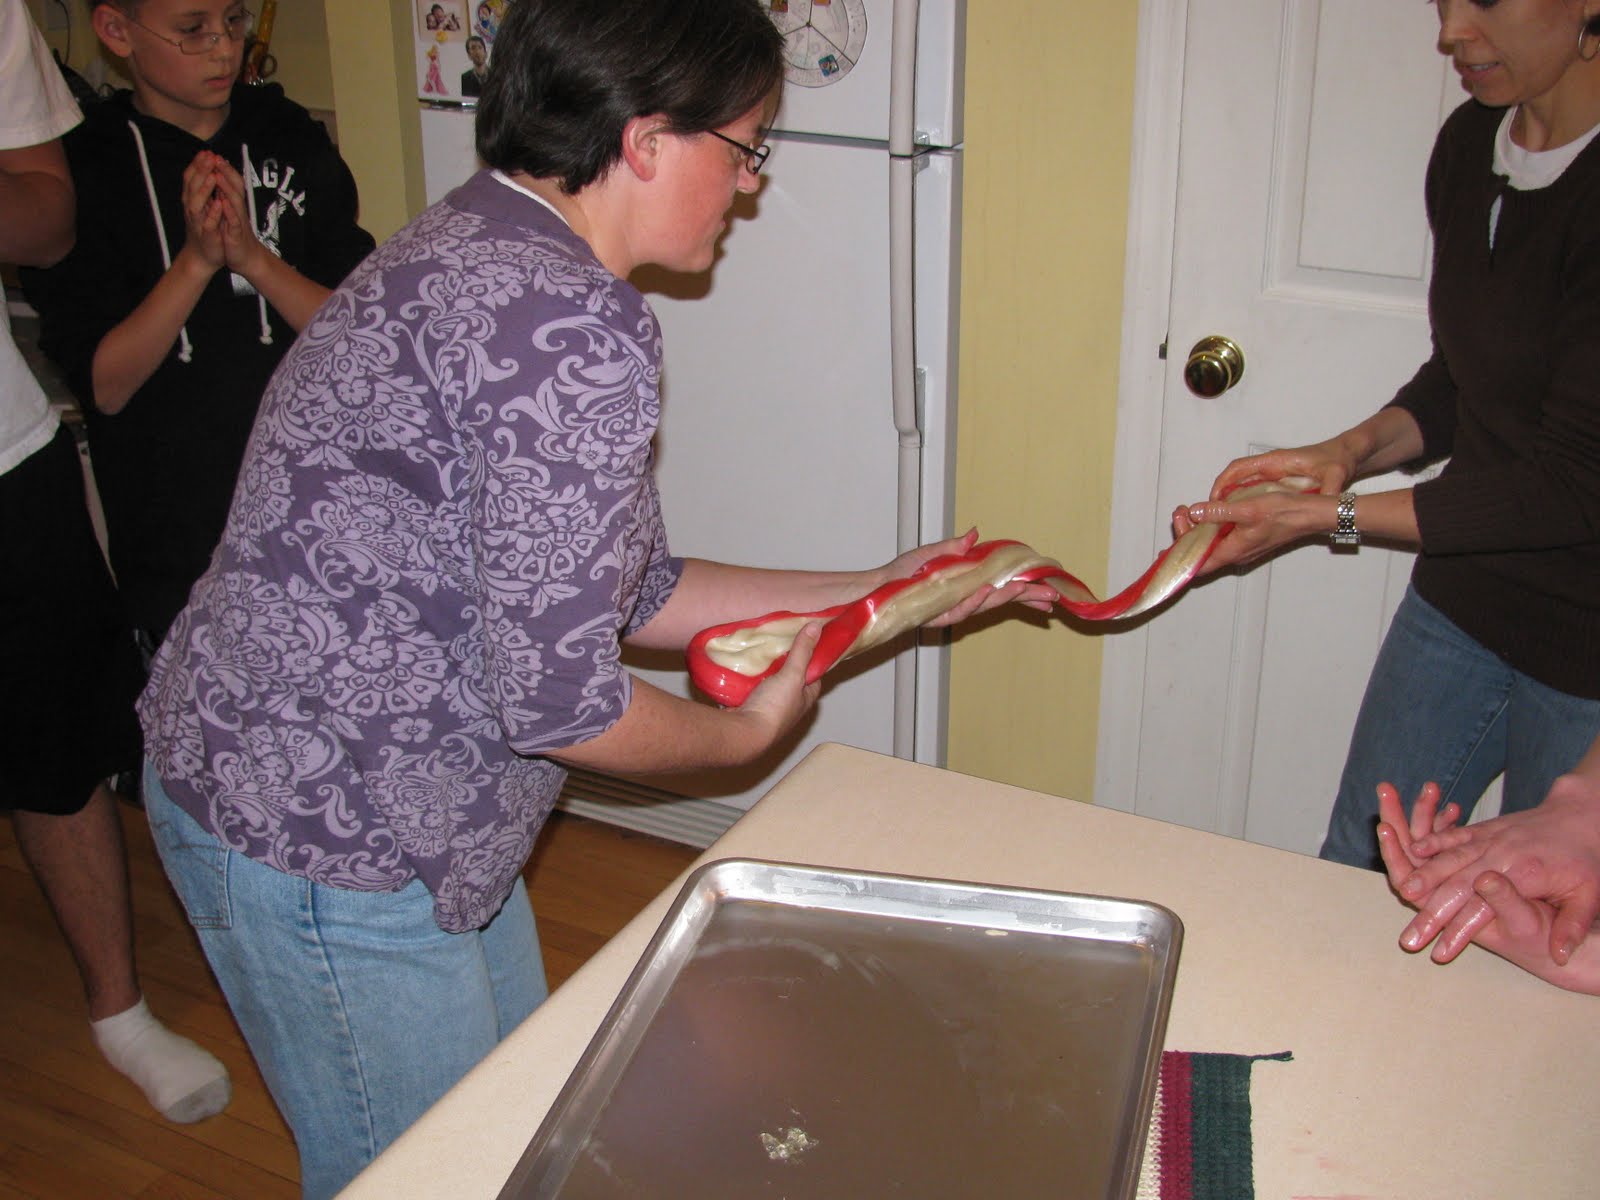

Place on a wooden board and roll (should be unfinished wood, or the candy cane will slide instead of rolling). Cut with kitchen shears once it gets too long for your two hand spans. Give 1/2 to someone else and both of you continue rolling on wooden boards, cutting and passing to someone new whenever a piece gets to be longer than your hand spans.

Place extra pieces on a buttered cookie sheet in a 170 degreee oven, with the door left open to keep warm till they can be rolled (pieces that get too cold to roll may also be placed in the oven to warm them up again). Continue rolling till desired size.
Shape into canes, or any other shape you desire. Place on waxed paper, making sure that the canes do not touch each other. (I always stock up on shirt boxes at Christmas time. Lined with wax paper, they are ideal for sending the candy canes home with your guests.)
The finished product! Some of the pictures are lousy and you'll notice that some years, the candy canes are whiter than others!
The finished product! Some of the pictures are lousy and you'll notice that some years, the candy canes are whiter than others!


Try it! You'll be glad you did!
I was going to ask you for the recipe for these!! I forgot that it was Alaine who did them. I was thinking about some fun things we could do this year with our friends and this would be perfect!!
ReplyDeleteOh my goodness, that is too fabulous!! I don't know how I'm just now seeing this post, but I LOVE IT!! I love knowing how to make things that I kind assumed just 'came' that way (like from a candy cane tree or something). One year I made marshmallows and was just amazed. I am definitely going to put this on my list of things to make.
ReplyDeleteI stopped by here the other day, but Google ate my comment! So now I'm back, and I just have to say, I have NEVER heard of making your own candy canes. What a great idea! It looks a little intimidating, but it sounds like it would be so fun to try for a party! Love it! Thanks for sharing.
ReplyDeleteAlso, I'm so happy your books arrived and you love them! I know you're super busy, but I'd love it if you'd post a review. (Let me know so I can link to you, if you do!)
THat looks like a lot of work, but fun too!
ReplyDelete