Showing posts with label Being Creative. Show all posts

Monday, February 13, 2012

DIY Fail

I've been looking at pictures like this one from here,


and this one from here


for quite some time now.

I learned how to make my own chalkboard paint and schemed and planned.

Hubders was going to be out of town for three days and so, once he left, I got started.

Here's how it unfolded.

I filled in the dings and nail holes in the wall and then gave the wall two coats of the original paint so that it looked pristine in it's yellow loveliness.

Next, I carefully measured and taped off my calendar, making sure that the squares were large enough to write multiple items on each each day.


I then gave it one more coat of yellow so that all the feathery paint streaks that manage to worm their way under the tape would be the wall color.

Then I started painting my chalkboard paint. I was sooo excited!!
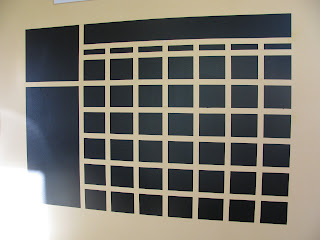

Not a great picture, but a great start! No vinyl title or labels yet, but it's a calendar with a place to leave notes and one to list family birthdays (and my daughters thought the optical illusion dots in between the squares were super cool).

The DIY chalkboard paint tutorial said that after you paint, you should sand it all lightly, which knocked off the black paint wherever there was a small bump from all the coats of paint and revealed lovely yellow dots randomly over the whole surface--not so pretty!


Then I was supposed to "prime" the chalkboard by covering the whole surface with chalk and erasing it all. Which I did. No picture of that one, but by this time, the whole thing is looking really sloppy.


But, I persevered, cleaned as best I could and got out the new chalk I had bought. I made the squares big so that multiple schedule items could be written on each day. Chalk has nothing in common with the words "fine tip" and that wide tip "skipped" on the less-than-smooth surface.

Not working. It's sloppy, hard to read, and there's not room to write multiple appointments.

My next attempt was chalk markers, bright happy colors, smaller tips. This just might work.


However, unless you have a very smooth surface, they don't want to erase (and they're expensive).
This was after considerable elbow grease. Not a happy moment.


And all of the elbow grease smeared the color onto the yellow background (lousy picture, I know, but you can see the mess around the edges of the square--and I still didn't get the square clean).


There were possible fixes that I explored, but the more I looked into it, the more I realized I wasn't going to be happy with the results.

So I sanded and sanded, and sanded and sanded some more.


Then I painted and whimpered because I could still see those stupid calendar lines.


But, two more coats and the wall was back to it's lovely yellow shade. I went and bought a calendar and put up one of these for messages, backed with a black foam core board.

It's not quite what I was after but it's workable, and the DIY option was a total fail!

Ya live and learn!


Saturday, November 27, 2010

Candy Cane Tutorial!

handmade projects

It's time for a quick break from wedding/Christmas preparations. I've wanted to do a tutorial on homemade candy canes for quite some time. If I don't do it now, it won't be any good until next Christmas season. This will be quick and may have lots of typos.

Eleven Christmases ago we moved to the midwest and a good lady in our ward invited us over to make candy canes with her family. I was perplexed. "You mean you make real candy canes?" She replied that they did. "With stripes and everything?" She assured me that they would even be striped. We enjoyed it so much that we now have a Candy Cane party with friends each year. It's become an important part of our celebration.

NOTE: Don't let the length of the written instructions deter you. I've incorporated all of the hints and tips from my friend into the recipe. It's not as extensive as it looks. I recommend that you have at least eight to twelve-ish people to do this, or you're going to get really tired of rolling them.

The recipe came from my friend's grandma. She was born in the 1880's, lived in Utah all her life and worked in a candy factory as a young girl. This is the recipe from the factory.

6 cups sugar
3 cups water
2/3 teaspoons salt
3 tablespoons light corn syrup
2/3 teaspoon cream of tartar
1/4 dram peppermint oil (or less) Available at pharmacies
red food coloring

In a large pot, combine sugar, water, salt and corn syrup. Stir really well, till all sugar crystals are dissolved (if any crystals remain when it starts to boil, the candy will turn amber). Over medium-high heat, bring to a boil (she cooks it on high because it's faster).


Then add the cream of tartar but DO NOT STIR. Put lid on pot to steam for three minutes. Remove lid and, with damp cloth, wipe crystals from sides of pan.


Cook to hard crack stage (300-310 degrees Fahrenheit). Mixture will bubble white over entire surface. According to my friend, the cold water test is the only way to be sure it has cooked long enough. You will actually hear a small crack when the candy is dropped into a cup of cold water.

Immediately removed the pot from the burner. Pour 2/3 onto a buttered cookie sheet to cool. Leave the other 1/3 in the pan to cool (this will be the stripe).

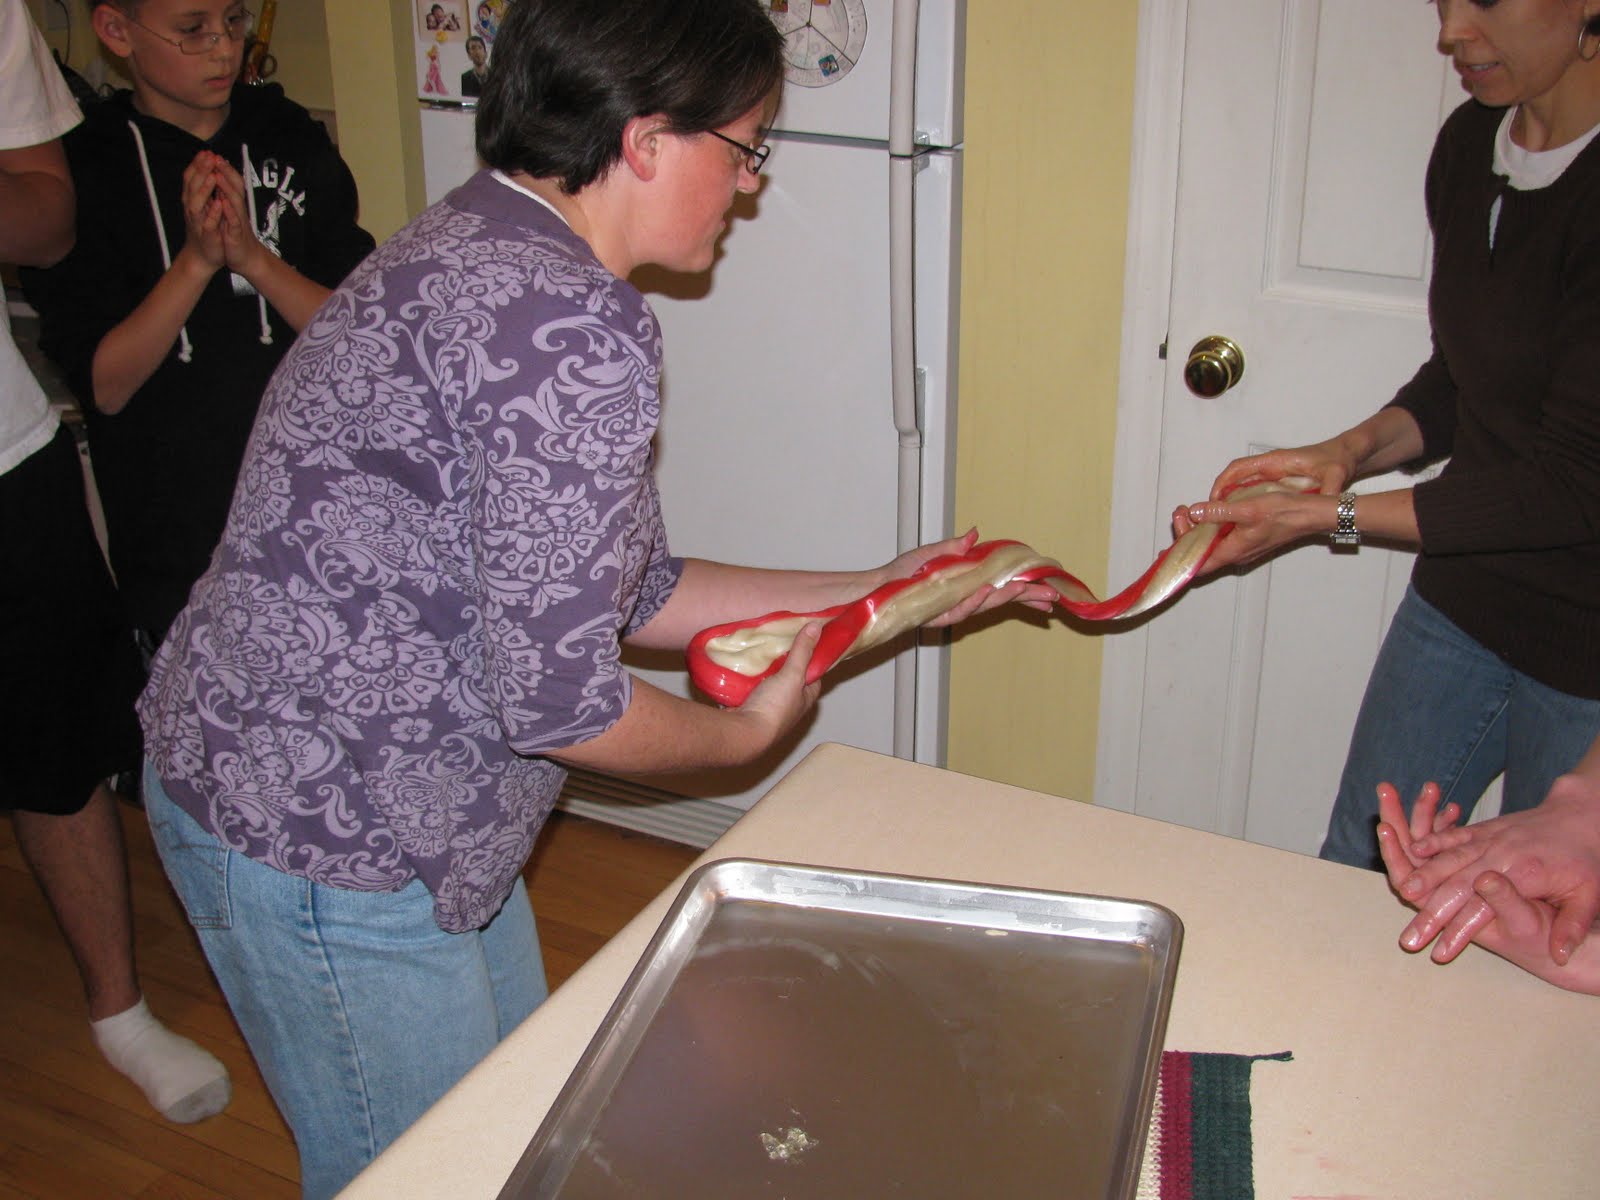
Once it is cool enough to handle, lightly butter hands and pull the candy white (doesn't take very long). While pulling, add flavor. Snip a small amount off with kitchen shears to test for flavor. Next, pull, flavor and color the stripe.

Here are our friends from Kansas who joined us for Thanksgiving pulling the candy white.


Hubders adding the red to the stripe.


Lump the white into a rough ball. Stretch the red into a rough rope and make a ring around the white.


With two people, stretch the whole thing out to about a foot or so and twist so the stripe goes around and around.


Place on a wooden board and roll (should be unfinished wood, or the candy cane will slide instead of rolling). Cut with kitchen shears once it gets too long for your two hand spans. Give 1/2 to someone else and both of you continue rolling on wooden boards, cutting and passing to someone new whenever a piece gets to be longer than your hand spans.


Place extra pieces on a buttered cookie sheet in a 170 degreee oven, with the door left open to keep warm till they can be rolled (pieces that get too cold to roll may also be placed in the oven to warm them up again). Continue rolling till desired size.

Shape into canes, or any other shape you desire. Place on waxed paper, making sure that the canes do not touch each other. (I always stock up on shirt boxes at Christmas time. Lined with wax paper, they are ideal for sending the candy canes home with your guests.)

The finished product! Some of the pictures are lousy and you'll notice that some years, the candy canes are whiter than others!


Try it! You'll be glad you did!

Saturday, April 10, 2010

One More Egg

I had a brain blip the other day and failed to post a picture of the coolest Easter egg of the day. Hubders only decorated one egg, but it's quite the egg! He dyed it and then used permanent markers to make this replica of a mosaic from one of the side chapels in the Cathedral Basilica of St Louis. He downloaded a picture from the internet and then drew it free hand. Yup, that MY man!!!

Friday, April 9, 2010

Internet again!

We have a decent internet connection again!!!!! Woo-hooo!

This post won't thrill anyone. It's barely going to get proof read (no extra time today!) No thoughtful ideas, nuthin' funny. Okay, now that all but my family and a smattering of closest friends are left, here are some things that I really wanted to post about and some pics to go along with them.

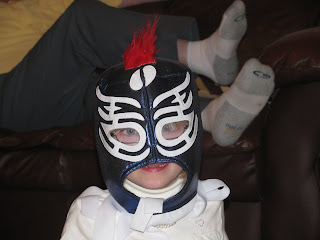
My oldest, Tough Guy and his adorable wife, Cutie Pie, just did a Mexican cruise with her family. They bought us these hilarious masks. Cutie Pie didn't understand why Tough Guy was insistent that these were the perfect thing to give us. But he knows us and we're just weird that way!
Side note: Hubders taught Jared Hess in seminary, so we, of course own Napolean Dynamite, but, I confess, I don't have any use for it. Nacho Libre, however is hilarious (in an incredibly embarrassing kind of way!)

Here's Girlie Whirl in mask #1
Bikey-boy in mask #2
No cool stories, nuthin' profound with this next picture. But it's a picture of my sis who came and spent a week with us (she's holding my adorable new niece). Muff (we've called her that since she was one year old!) is a fabulous, funny, caring person and having in her my life is a beautiful thing. It's a full 20 hour drive from her house to mine, so visits are few and far between. We had a blast!!! Come back soon, girl!!


No school on friday, so we invited my sis and our neighbors to the north (our two favorite families to play with), to decorate Easter eggs. It was two full hours of creative juices flowing everywhere (yup, some of them even flowed into my lap in the form of blue dye. It washed out of the pants just fine, but parts of me looked like a smurf for days!)

Here are pictures and short explanations of the three methods we used.

These ones were dyed normally and then artist tissue paper (not the wrapping paper kind) was applied to the damp egg. After they dried the paper was peeled off. Very fun way to decorate eggs!! Thanks sis!

Duck tape was used to mask off parts of the egg and then the eggs were dyed. (again, sis's idea)

These were dyed with silk ties. We did this last year and I wanted to try it again. Opening them up once they've cooled is so fun! You never know what you're gonna get.


Saturday, March 20, 2010

Catching up. #1 Dangerous Things!

My husband recently bought the book: Fifty Dangerous Things (You Should Let Your Children Do) by Gever Tulley and Julie Spiegler. It's well worth the price. I agree with the premise that if all corners are rounded and everything is made of plastic, our children miss out on a lot of learning/creative opportunities.

We chose ten things from the book, invited our neighbors to the north, and made a day of it.

Here are a few of the photos:

Dinner cooked in the dishwasher. (And, yes, we washed dishes on the bottom rack!)
Launching a hot air balloon in the family room (it sorta worked!)
Smashing thrift store dishes (this was a definite favorite!)


The end result in the garbage can.


An overcooked peep fresh from the microwave (the grapes sparked a little, the CD's were a spectacular three seconds and the marshmallows were HUGE!)


Taking apart appliances. This one was another fav. We took apart a printer, a joy stick, an adding machine, a keyboard and a telephone. Lot's of cool parts inside!

This is our bomb in a baggie right before it exploded!
Girlie-Whirl about to lick a 9-volt battery!
We didn't get any good pictures of the super glued fingers but it was a big hit. No dry ice to be found so that didn't happen. But our neighbors said they're going to plan a whole day around dry ice and invite us over! Can't wait!

Saturday, April 11, 2009

Easter Eggs!

I found a tutorial on dyeing easter eggs with silk ties at Our Best Bites http://www.ourbestbites.com/2008/03/silk-dyed-eggs.html and decided to try it. We invited some friends over and tried it out. It was alot of fun. Here are some of our results. I love the subtle colors. Unwrapping them was so much fun.
They're prettier in real life, but then isn't everything!


Tuesday, February 3, 2009

Making Candy Canes!!!

I've been meaning to blog about candy-cane making in December (one of my favorite Christmas traditions). I hadn't found the time, but a good friend just gave me a video that she made of that night. Enjoy a bit of our candy cane evening! The video is 2:46 long. (and thanks, for the video, girl!!!--have you ever thought of becoming a video editor!!?)